Use AWS Lambda to parse JSON to a NACHA-formatted string
This walkthrough provides instructions on how to use the github.com/moov-io/ach Go library to
parse a JSON object in a Lambda event and return the resulting NACHA-formatted string.
The Lambda event could be triggered by a variety of sources: upload to S3 bucket, API Gateway HTTP request, SQS message, another Lambda, etc. Likewise, the response can be sent to a variety of destinations. This walkthrough doesn’t demonstrate a particular trigger or destination, but it can easily be adapted for the use cases mentioned.
Make sure you’ve built your project for AWS Lambda.
1. Create the Go file
Create a new Go file named main.go and replace it’s contents with the following:
package main

import (
	"bytes"

	"github.com/aws/aws-lambda-go/lambda"
	"github.com/moov-io/ach"
	"github.com/moov-io/base"
)

type JsonRequest struct {
	Json ach.File `json:"input"`
}

type JsonResponse struct {
	Message string `json:"output"`
}

func main() {
	lambda.Start(HandleRequest)
}

// logic to be executed when lambda starts goes here
func HandleRequest(event JsonRequest) (JsonResponse, error) {

	// get file from lambda event, it has already been marshalled from json to ach.File by Go
	file := event.Json

	// set file ID
	file.ID = base.ID()

	// validate parsed file
	err := file.Validate()
	if err != nil {
		return JsonResponse{Message: ""}, err
	}

	// create buffer to contain NACHA text
	buf := new(bytes.Buffer)

	// write ach.File to buffer
	err = ach.NewWriter(buf).Write(&file)

	// marshal response to lambda as json
	return JsonResponse{Message: buf.String()}, err
}
main() is invoked when the lambda is triggered
HandleRequest() is the callback containing the business logic and accepts a lambda event as a parameter with the shape:
{
    "input": { ...JSON representing ACH file }
}
JsonRequest mirrors this shape and makes the contents accessible in HandleRequest(). This event can be changed to fit
your needs, all you need to do is update the JsonRequest struct and make sure the trigger for this lambda is passing in the expected event.
JsonResponse is used to encode the response to the caller. The ACH file’s data (a string) is the value of the output field of the response.
{
    "output": "[TEXT OF THE ACH FILE]"
}
2. Build your file for AWS Lambda
Now that you’ve saved your Go file, you need to build it for use with AWS Lambdas. See Build a Go file for AWS Lambda for more details.
3. Create the Lambda function in AWS console
Sign into the AWS Console and head over to the Lambdas section and create a new function.
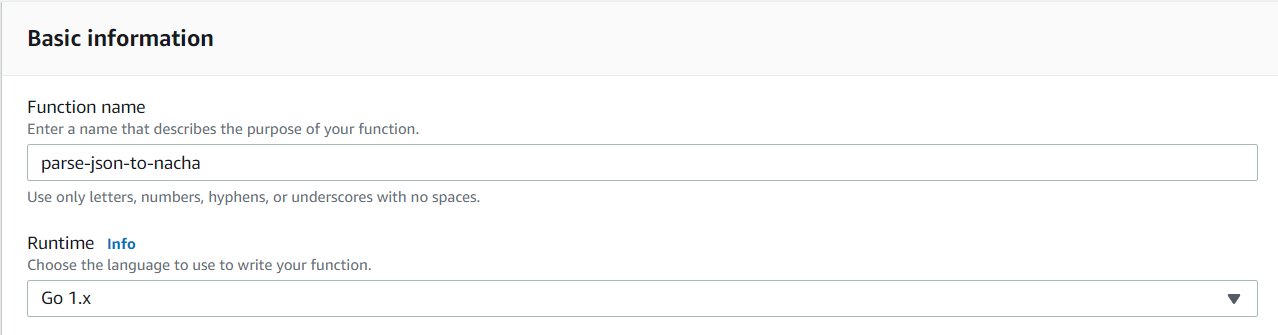
Select Author From Scratch

Under Basic Information, enter a name for your function (e.g. parse-json-to-nacha) and select Go as the Runtime
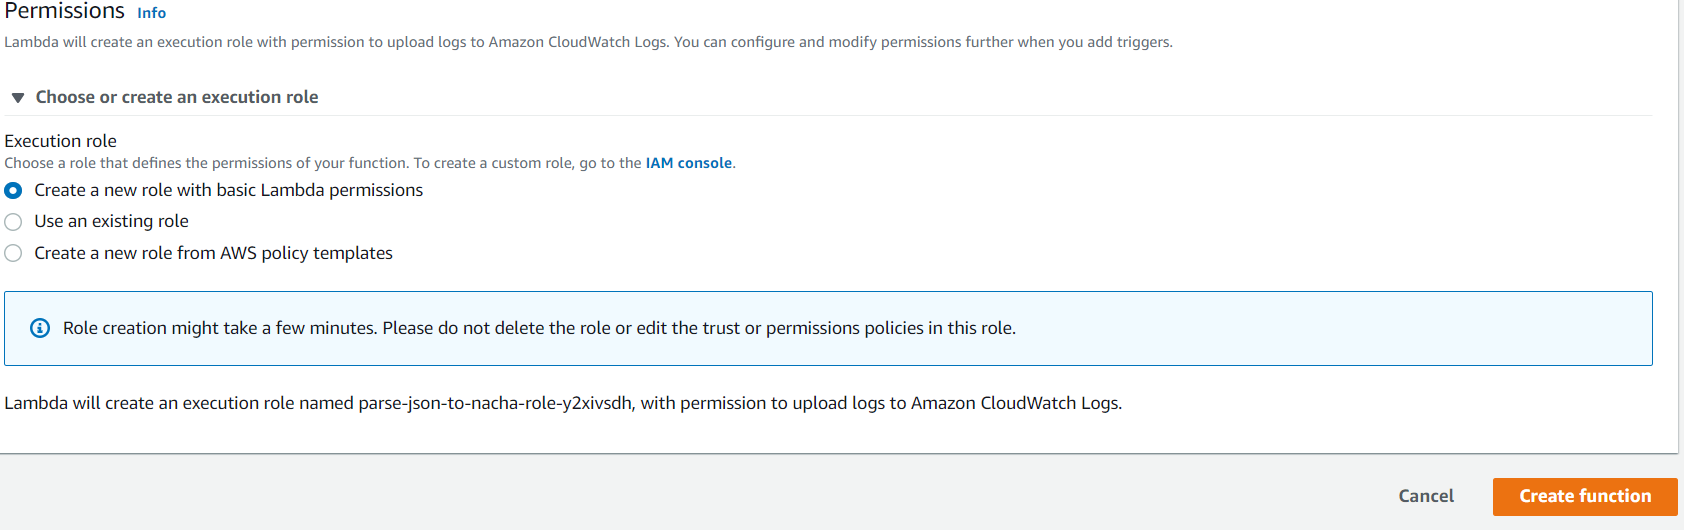
By default, AWS will create a new permissions role for your function with all lambda permissions. This is adequate for this tutorial, but if you plan to access other AWS services from this function you will need to add permissions. Click Create Function in the bottom right after you’ve selected your desired role.
4. Configure function and upload executable
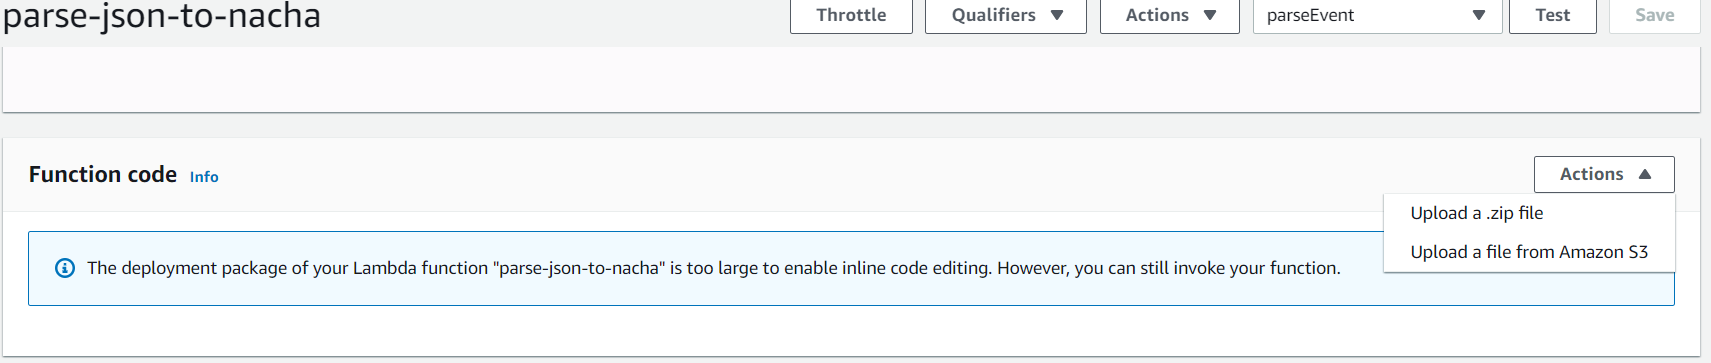
AWS Lambdas don’t currently support inline editing of Go files so you will need to upload the zip file you created in step 2. Click the Actions dropdown in the Function Code section, select Upload a .zip file, upload your zip and click Save.
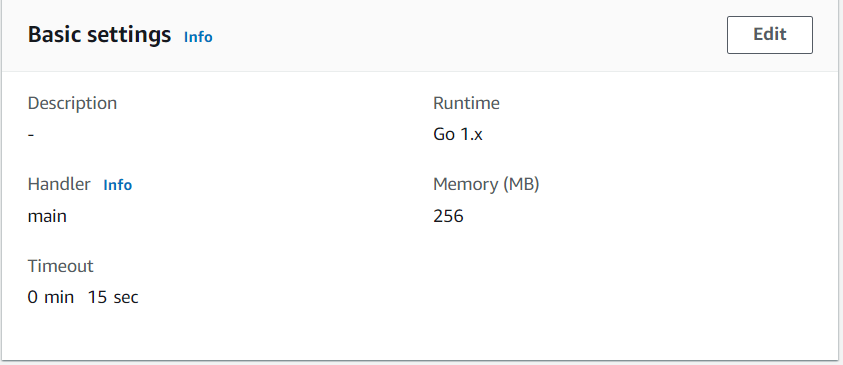
Now scroll down to the Basic Settings section. Handler needs to be set to the name of your executable file from step 2. In our case, the executable name is main. Click Edit and change the Handler from hello to main.
Finally, we will create two test events to confirm our function is working as expected.
The first event will be used to confirm the JSON is parsed correctly. Click the dropdown to the left of the Test button at the top of the page and select Configure test events.

Leave the hello-world template selected and enter a name for your event (e.g. parseEvent).
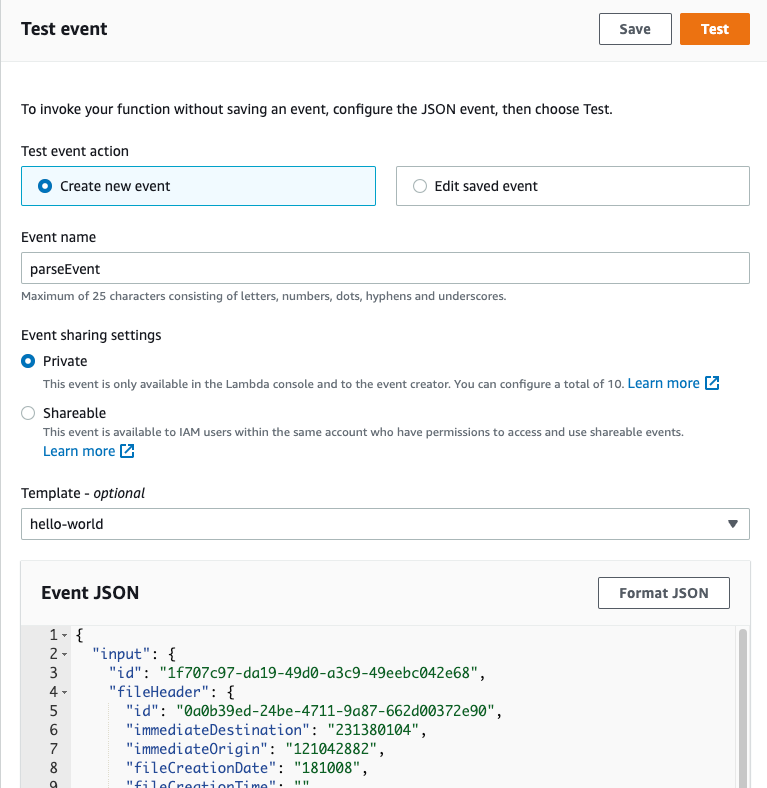
Replace the contents of the code editor with the following:
{
  "input": {
    "id": "",
    "fileHeader": {
      "id": "",
      "immediateDestination": "031300012",
      "immediateOrigin": "231380104",
      "fileCreationDate": "190816",
      "fileCreationTime": "1055",
      "fileIDModifier": "A",
      "immediateDestinationName": "Federal Reserve Bank",
      "immediateOriginName": "My Bank Name",
      "referenceCode": "12345678"
    },
    "batches": [
      {
        "batchHeader": {
          "id": "",
          "serviceClassCode": 225,
          "companyName": "Name on Account",
          "companyIdentification": "231380104",
          "standardEntryClassCode": "PPD",
          "companyEntryDescription": "REG.SALARY",
          "effectiveEntryDate": "190816",
          "originatorStatusCode": 1,
          "ODFIIdentification": "12104288",
          "batchNumber": 1
        },
        "entryDetails": [
          {
            "id": "",
            "transactionCode": 27,
            "RDFIIdentification": "23138010",
            "checkDigit": "4",
            "DFIAccountNumber": "123456789        ",
            "amount": 200000000,
            "identificationNumber": "               ",
            "individualName": "Debit Account         ",
            "discretionaryData": "  ",
            "traceNumber": "121042880000001"
          }
        ],
        "batchControl": {
          "id": "",
          "serviceClassCode": 225,
          "entryAddendaCount": 1,
          "entryHash": 23138010,
          "totalDebit": 200000000,
          "totalCredit": 0,
          "companyIdentification": "231380104",
          "ODFIIdentification": "12104288",
          "batchNumber": 1
        },
        "offset": null
      }
    ],
    "IATBatches": null,
    "fileControl": {
      "id": "",
      "batchCount": 1,
      "blockCount": 1,
      "entryAddendaCount": 1,
      "entryHash": 23138010,
      "totalDebit": 200000000,
      "totalCredit": 0
    },
    "fileADVControl": {
      "id": "",
      "batchCount": 0,
      "entryAddendaCount": 0,
      "entryHash": 0,
      "totalDebit": 0,
      "totalCredit": 0
    },
    "NotificationOfChange": null,
    "ReturnEntries": null
  }
}
This JSON will be handled by HandleRequest(). Note the top level input field which matches the shape we covered in step 1. Click Create at the bottom when you’re finished making changes.
Now create your second event, which is designed to cause an error while parsing so you can see how the function returns errors from Go code. Create a new event with a different name (e.g. parseEventError) and modify the JSON.
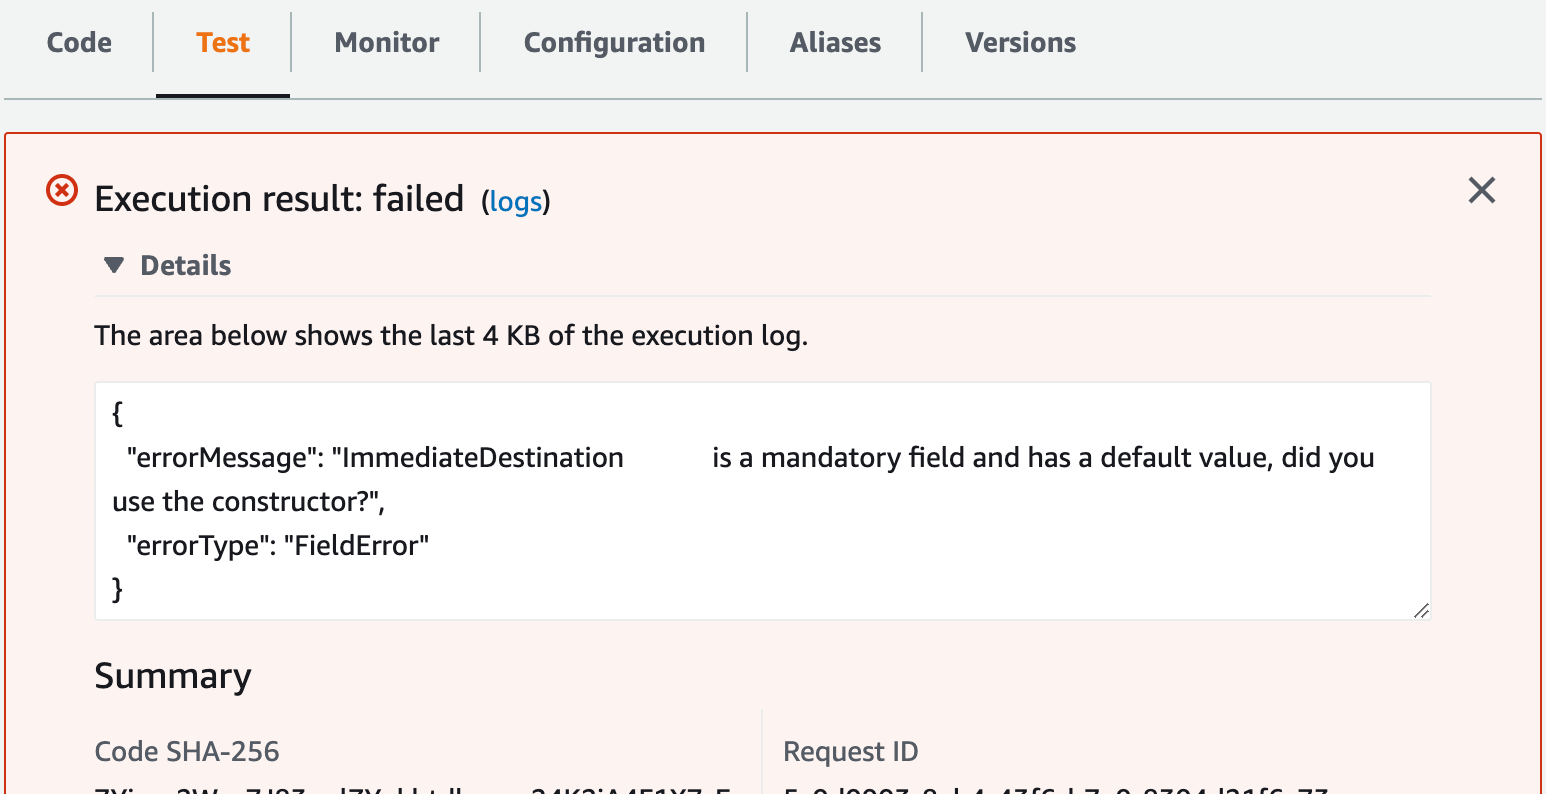
Change the JSON above by setting immediateDestination to be an empty string. This should result in an error stating that the immediateDestination should be 9 numeric digits.
{
  "input": {
    "id": "",
    "fileHeader": {
      "id": "",
      "immediateDestination": "",
	  ...
}
5. Run/Test your function
Now you can finally test your function.
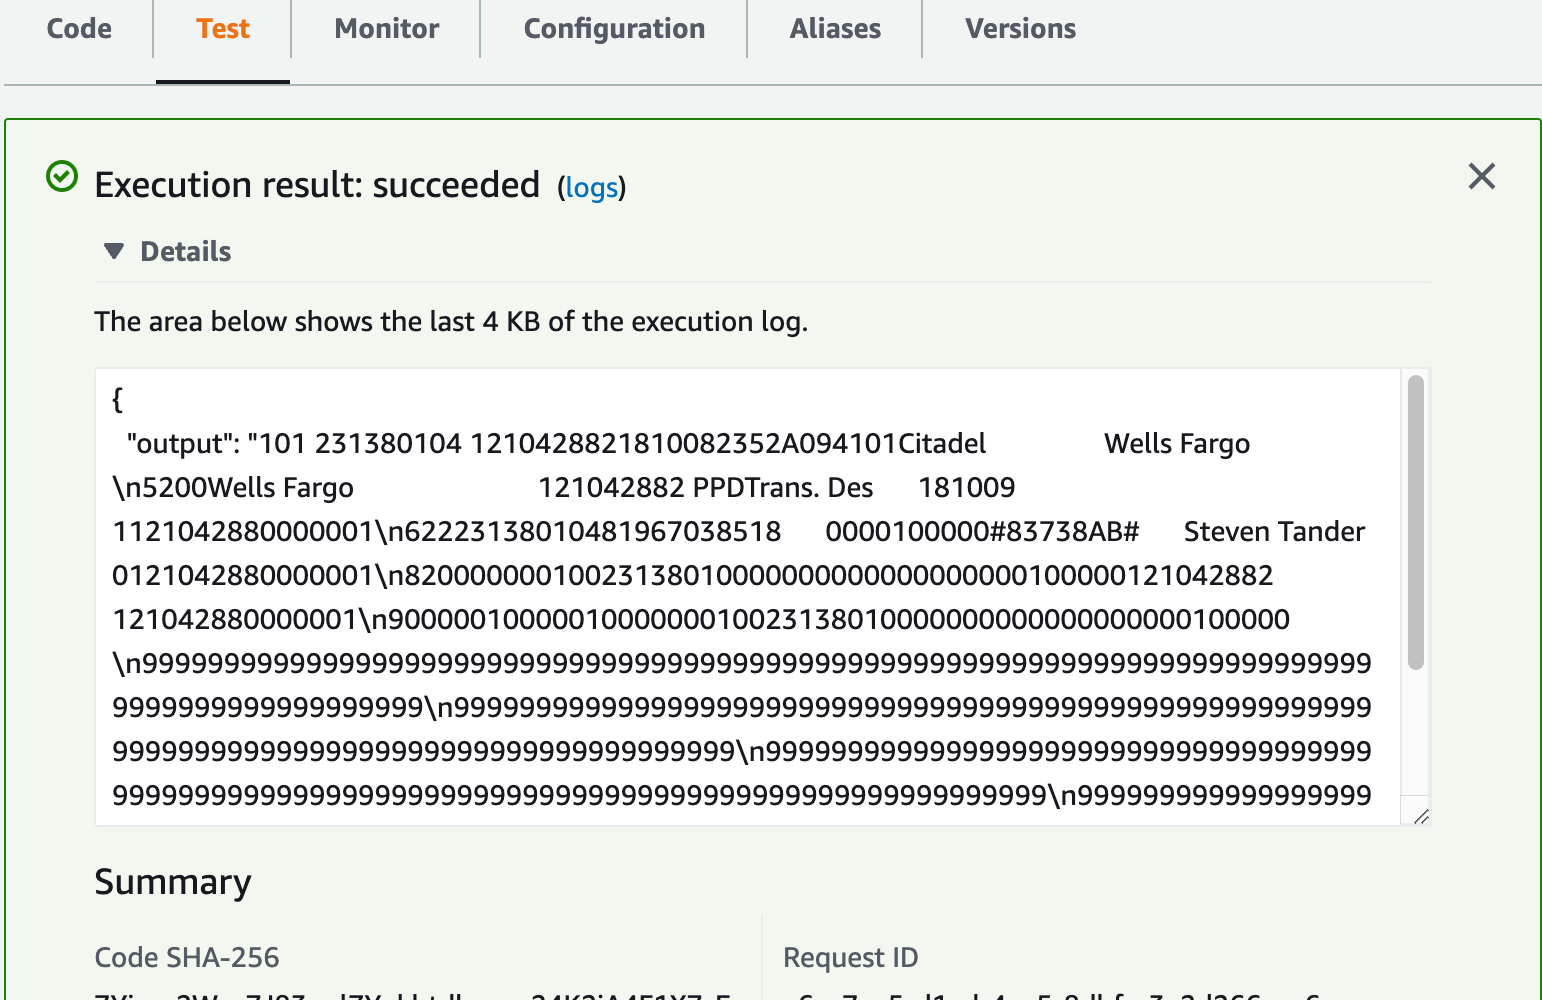
Go to the top of the page, select your successful test event (e.g. parseEvent) and click Test. You should receive a succcessful response similar to the following:
Now test your error event (e.g. parseEventError). You should receive an error response similar to the following:
And that’s it! You’ve successfully created and tested a lambda function that parses JSON into a NACHA-formatted string.